Project Process
First, install the TERapidPrototypingTool.exe onto your desktop computer. You will have the option to add a desktop shortcut. Once that is finished installing, open the application and begin creating your Tangible Engine application!
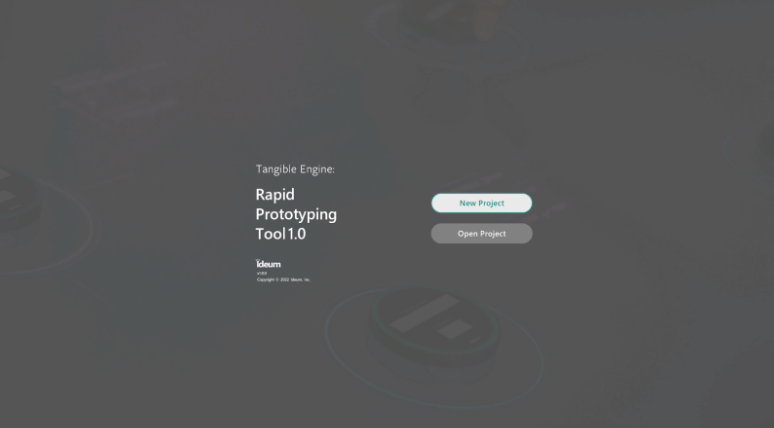
Creating a New Project
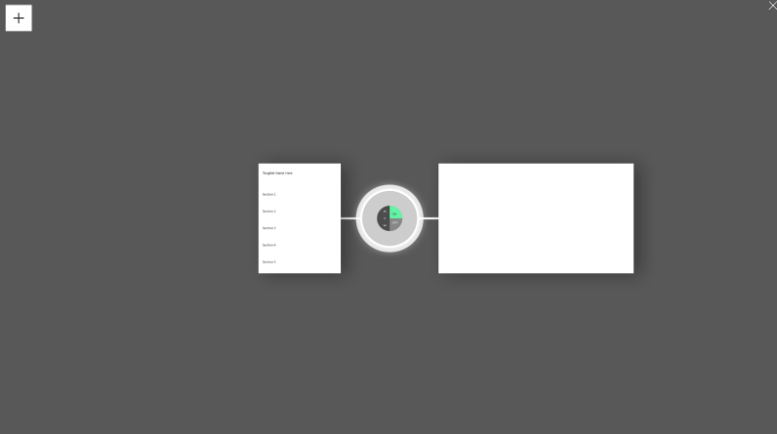
From the home screen, or from the editor, select “New Project”. This will open a blank editor and allow you to start working on your project.

The editor has text that will prompt you to add a new tangible to the scene to get started. This can be done by pressing the tab with the + sign on it. Since the default Ideum tangible set comes with 9 different patterns, the editor will allow for 9 tangibles to be created per project.
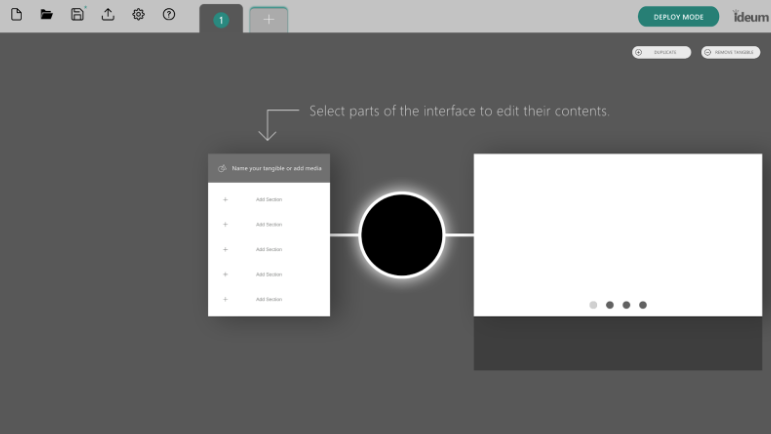
As the next text prompt states, you can hover your mouse over different parts of the tangible to reveal specific editors, allowing each tangible to be as custom as possible.
Utilizing the Editors
Tangible Editor

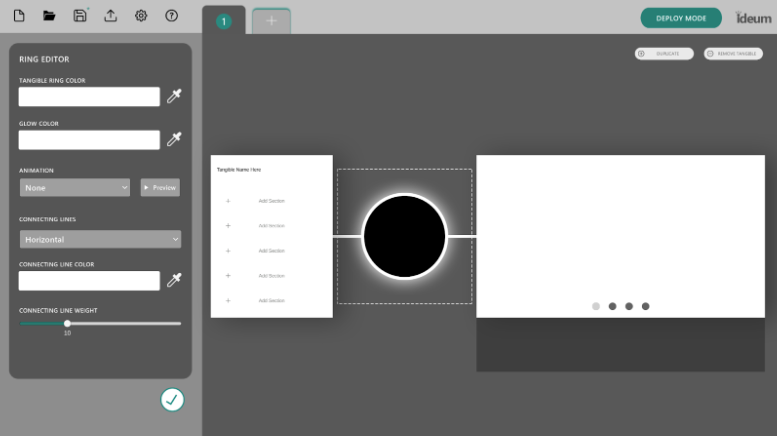
Ring Editor
Section Editor

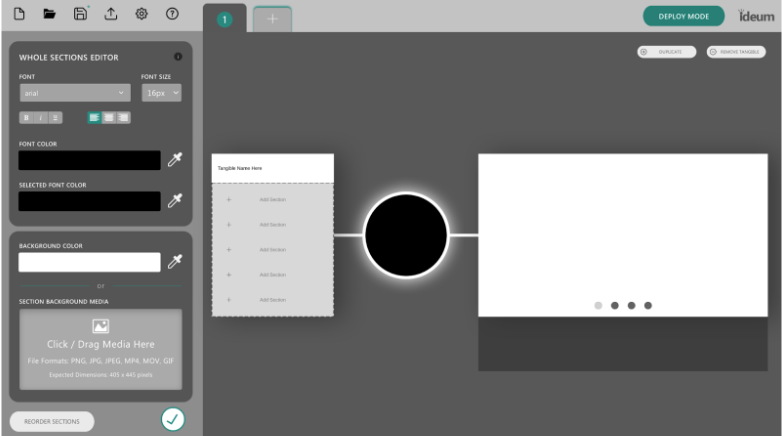
Whole Sections Editor
Fonts
Project Settings

Project Settings can be opened by clicking on the gear icon in the top menu bar.
The settings include enabling simulated tangibles, using our larger set of beverage tangibles versus the standard size tangibles, background and start up media, adding a drop shadow to your tangibles to make them stand out from the background, and showing tutorial text when the application is first opened.
Tutorial text can be used to help users understand what they need to do to interact with the application, or can be something fun that sets the tone of your project.
Some examples of tutorial text:
- Place a tangible on the table to begin!
- Welcome to a unique experience!
- Learn more about ____ by placing a tangible on the table
Once a tangible has been placed down, the tutorial text and startup overlay will fade out and allow the users to play with the rest of the application.
Saving a Project
To save a brand new project, click on the save button in the top menu bar. A file explorer popup will open and ask you to select your destination folder. Once selected, you’ll be asked to give your project a name.
Your project can be named whatever you’d like it to be, but it cannot contain spaces. Spaces will be replaced with underscores.Your project will be saved as a JSON file in the directory you selected, and a Media folder will accompany it. Any media saved in the project will be copied over to this Media folder and referenced the next time that project is opened.
Any changes after saving a project will cause a green star indicator to show next to the save button to let the user know that they have unsaved changes.
Saving an already existing project will update that project’s timestamp and will overwrite the existing JSON file for that project.
Opening an Existing Project
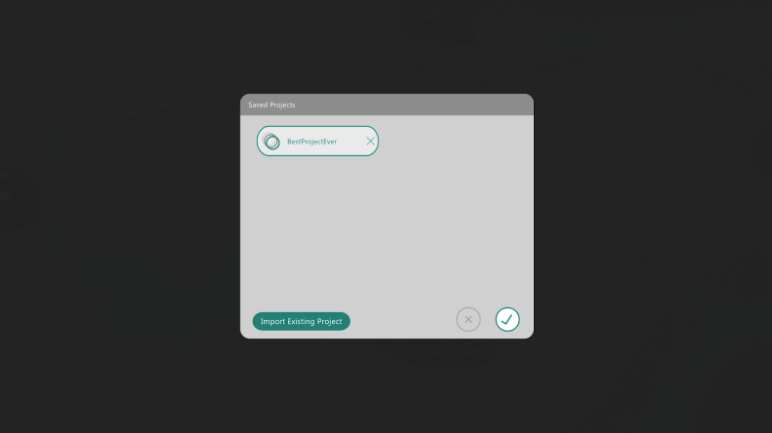
To open an existing project, or even import an existing project, click the “Open Project” button from the main menu or the Editor. A popup window of saved projects will open and show the names of the existing projects already loaded into the application.
To open a project from the list, either double click the name, or select that name and click the checkbox button.

To import an existing project that isn’t in the list of saved projects, click the “Import Existing Project” button. A file explorer popup will open and ask you to select the project’s JSON file.
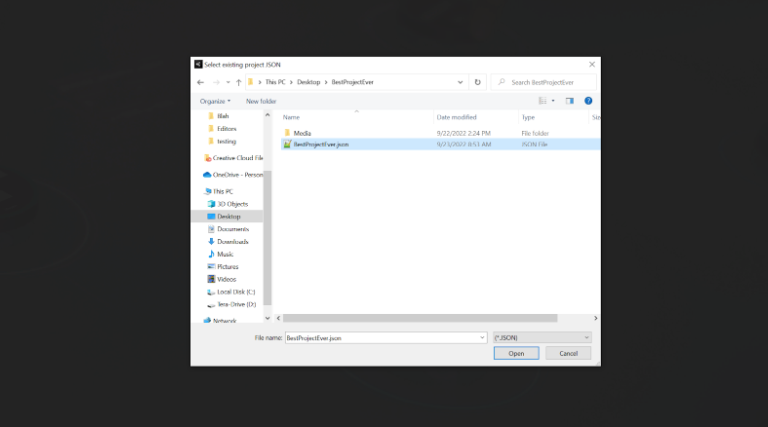
Once selected, click “Open”. If the JSON file chosen is valid, a new button will appear with the name of the imported project.
Deploying a Project
“Deploy Mode” exists so that users on a desktop computer can test to see what their application will look like when it’s finished and it’s placed on an Ideum touch table. Deploy Mode does not require the use of any physical tangibles because it utilizes Tangible Engine v3’s in-editor simulated tangible experience.
To use Deploy Mode, make sure you have at least one tangible created in the editor. Then, select the Deploy Mode button in the top right hand corner.

The application will transform to fit your monitor, scaling all items with it.
If “Enable Simulated Tangibles” is checked in the settings, then a white box with a plus sign will appear in the top left corner of the screen, allowing you to add simulated tangibles.
If “Use Beverage Tangibles (5.25)” is checked in the settings, then the UI around the tangible will scale up and adjust itself to fit around the larger sized tangibles.
The ID of the simulated tangible corresponds to the tab of the tangible, but starts at 0 instead of 1. So an ID of 0 will show tangible number 1, and so on.
If “Enable Simulated Tangibles” is not checked, then the Tangible Engine service will be used instead and physical tangibles are expected. Make sure to have Tangible Engine v3 running on the machine before enabling Deploy Mode.
Exporting a Project
When your project is finished and you are ready to export it into its own portable application, save your project, and click the export button in the top menu bar.

A popup will open and ask where you’d like to place your exported installer. Once a location is selected, the exporting process will begin and could take a few minutes to process.
When finished, a button will appear that will open file explorer to the directory where the installer was saved.
If there is an issue, an error will be displayed instead of the finished button, and will direct you to view the application logs. These logs can then be sent to Ideum support for troubleshooting.
Logs can be found here: C:\Users\{YOUR USER HERE}\AppData\LocalLow\Ideum\TERapidPrototypingTool
The final product will be an executable called “YourProjectName_Installer.exe” and can be run and installed on any Windows 10 and above machine. That machine will need to also have Tangible Engine v3 installed and running to get your tangibles to show up when a puck is placed on the machine / Ideum touch table.


